Posts

Showing posts from January, 2012

Welcome to the Blog Hop!

Image
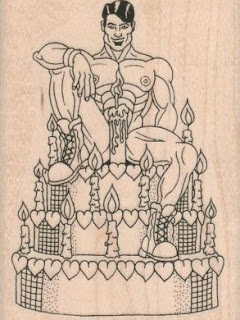
Welcome to our joint Amazing Mold Putty and Creative Paperclay blog hop. I've used Creative Paperclay a few times over the years, and have always found it enjoyable to work with. I've learned a few new things about it, though, since I've been using it so much lately! Be sure to visit all of the blogs in the hop. Make your comments. Become a follower. Someone will win one package of Amazing Mold Putty AND  one package of Creative Paperclay! YEAH! But ya gotta comment to have a chance to win, baby! The blog links are all on the right side of the page. I am giving away blog candy as well! One lucky winner will receive this project!!  TO have your name in the hat, you need to comment here, share this post (please say how you shared it in your comments!), and become a follower if you aren't one already. Are ya ready? On with the show! Supplies: Creative Paperclay Amazing Mold Putty Rubber to Rubber mold release (not vial, but makes releasing the stamp a LOT easie

Doodlebug Design Inc Blog: CHA Winter 2012 Release - Hello Spring Collection

Doodlebug Design Inc Blog: CHA Winter 2012 Release - Hello Spring Collection : Did you see our post from yesterday? It shows some great pictures of our booth at CHA !! And now, we are so excited to introduce you to our ...

Celebrating with Viva Las Vegastamps!

Image
Yep, here are VLVS we're celebrating the entire month of January! And if you know me, you know I love a part-tay!! My card today is a title risqué, so if you don't swing that way, please avert your eyes!  HA!! This card used some scrap papers, which made me very happy. And it includes a nekkid man, which makes me happy. LOL! So are ya ready? On with the show.... Supplies: Card Base Patterned Papers Craft Paper Scraps Stickles Foam Tape/Pop Dots Miracle Tape STAMPS!! Birthday Cake Man & Exciting Birthday Markers to Color your Nekkid Man (I used Stampin Up markers) Black Ink (I used Memories by Stewart Superior) Circle Punch Scissors (my go-to for precision cutting are Cutter Bees) Swirl Die Cut (mine is cut from craft paper with a Sizzix die) Paper Trimmer Distress Ink- Black Soot, Vintage Photo Inking Handle Stipple Brush Blue & Green Inks Spellbinder's Dies and Die Cut Machine Flower Brad Baker's Twine Here's your man: I mean, seriously, how can you n

So Sad... and some cards

Image
Dang guys, I'm not sure what to think!  My last blog candy give away, only ONE person out of the three sent me their mailing info.  I am left to wonder why?  Lets one think that blog candy isn't worth the effort!! Here's some cards :) Anndddd...here's your wiener.  And another wiener. And a Blue Heeler!

I'll be a guest blogger at Crafty and Green!

Image
Come check me out January 19th on the Crafty and Green blog,  I'll be making some fun stuff out of my SCRAPS, baby!! YEAH!!

Storing Your Distress Ink Foam Pads

Image
 I've always stored my foams in little 2x3" baggies with the color name written on the front of the baggie.  I then punched a hole in the top of the baggies and put them on a huge binder ring.  I've done it this way for years- but I've been annoyed with it for awhile now. While chillin' in JoAnns last week one day, I spied this pink Art Bin container. Heck yeah, it's PINK!!!  So I brought it home. Cause it's pink.   So I took all of the foams out of their baggies,  decided which colors I could handle having on the same foams  (Tim Holtz says use one for each color family, I can't bring myself to do it! But there were a few colors that I could use together, such as Broken China & Tumbled Glass) I used a fine point Sharpie and put the initials of the color on the side of the foam pad.  Then lined them up in the compartments. Four foams fit into each compartment comfortably.  There's room left over for more, too. I have a few clean ones in there

And the winners are....

Image
FRANCINE B- You'll be receiving the glass leaf bracelet. Thank you for following and sharing!! KELLY AKA CHANTRYSS- You'll be receiving the bird house! Thank you for commenting, following,  and sharing!! JOE ROTELLA- You win your choice of the owl (tell me what colors you'd like it done in) or the $10.00 gift cert to the shop. Thanks for following and sharing!! MOLOSSUS- You win your choice of the page kit or a $5.00 gift cert to the shop (in case you don't want the page kit!). Thanks for following an sharing! Yep, I gave away some extra blog candy! Everyone please email me your mailing info at reflecktions@gmail.com by the end of next week.  I'll be going to the post office on Friday!!! Here's your wiener! Sammy and Charlie Girl playing in the snow last winter. He LOVES the snow!

New Year, New Blog- BLOG CANDY!!!

Image
**UPDATE** If we reach 50 comments, and 50 followers by 11:59 tonight, I will give away 10 pieces of blog candy, instead of only 3!!!! Hello my fine feathered friends! I've changed the biz name, so decided to start a new blog.  Website is being worked on and will be unveiled soon! And in the spirit of fresh starts and sharing the love,  I'm giving away blog candy. How do you win blog candy? Well, let me tell you! I'm giving away a few different things.  To be in the running, you need to: 1. Become a follower of THIS blog. 2. Comment on THIS post (and tell me you're following!) 3. Share this blog on Facebook or on your own blog 4. Go to my Etsy shop and look around, tell me what item you'd like to have from it in your comment. You have until 11:59 (my time)  Friday, January 6th  to get your following, commenting, sharing done.  I'll be using the random.org tool to choose the  winners on Saturday!!! B l o g C a n d y :  Kit to create six recipe