Posts

Showing posts from 2014

Just Doodlin' Around

Image
Been doodling at work, it's great stress relief :) Faber Castell Pitt pen, Copelle sketch book, waterer colors 

Let Your Art Blossom

Image

Sounds About Right

Image

Bark if You Love Somebody

Image
Today I want to share this freaking ADORABLE little album with ya! Genuinely Jane Studios creates some of the cutest things, I swear :) This book is 4x4" and has a dog bone cut out of the front cover.   Here's our fur kids         For this project I used the book from Genuinely Jane Studios, paper & stickers from Echo Park, Stickles, ribbon and trims, Miracle Tape and a stamp from Viva Las Vegastamps , and E600 glue. Wood veneer hearts from Studio Calico which were colored using Smooch Spritz, watercolor paints, and Stickles.   Front cover                                                                  Back Cover  Inside front cover                                                      Inside back cover          

You're My Favorite....card using Globcraft goodies!

Image
Yes, my yearning for springtime weather continues on. I am really loving the new spring Enamel Gel colors and intend to play with them a LOT!     So.....wanna make a card? YAY!         Supplies: Folded card base, patterned paper (this is Amy Tan paper), trims, paper flowers, bling, scissors, toothpick, small tag or ticket shape (with a sentiment on it, or stamp one on), pop dots, Enamel Powder Adhesive Enamel Gels: White, Rose Pearl, Daffodil, Avocado Enamel Powders: Aged Pink & Shamrock Dreams Piccolos : Daisy Floral Accents & Flower Curls     What to do: 1. Cover the front of the card with patterned paper. Choose a second patterned paper to fit into the frame from one of the Piccolo sets that we are using.   2. Take the frame and coat it with Enamel Adhesive Fluid. Then coat with the Aged Pink powder and heat it up to melt the powder and activate the adhesive. It is soooo pretty!   3. Adhere the patterned paper to the frame

Hello Friend

Image
Here's a quick little card for ya! Base is a pre-made card from Pebbles. Patterned paper from Any Tangerine. The pennants were stamped with My Stamp Box "Mini Pennants" set and 'hello' was stamped with "Mini Alphabet- Small Box".  I use these letters a TON!!

The Big Pink Toolbox

Image
My most favorite, wonderful, awesome crafty studio item is my big pink MAC toolbox. We bought it two years ago. Every October MAC sells them for Wrenching for the Cure- part of the proceeds goes to breast cancer charities. Now, there is a company called The Pink Box that sells pink toolboxes all the time, so you can always order from them if ya want one badly!     I thought I'd share how I've got this bad boy loaded up. There is actually empty space in it, too!   Please excuse the messy worktop!   The top drawer is the coloring drawer- alcohol inks, Gelatos, Pan Pastels, pencils, sprays, etc all live here.       The next drawer is the ink drawer.     Drawer three is random artsy fartsy fun.   Next, art journaling goodies.       Now we have the design team drawer. This is where I keep the stuff I'm supposed to work with.    This drawer holds memorabilia that needs attention, inky binkies, and some 8x8

A Little Vintage Love

Image
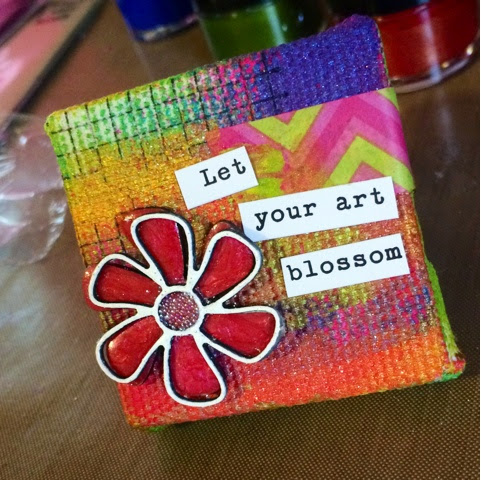
  Howdy folks!       Today we will play with the awesome French Oval Classic Bubble frame kit along with Vintage Dress Form embellishments, flowers, inks, and enamel powders.   Want to make it? Sweet!   What you'll need: Piccolos Vintage Dress Form Embellishments & French Oval Bubble Frame Kit Enamel Powders: Gilded Rose Gold , Aged White , Vintage Black   Enamel powder Adhesive Enamel Gels: Rose Pearl & Gold E600 glue Adirodack inks- Butterscotch, Cranberry, and Ginger Flowers Pink Gelato Paint brush, water, stipple brushes or sponges, heat tool, tooth picks, clamps/clothespins, heavy book, word sticker, scrap of black wire, Ranger's Sticky back canvas (or some good card stock and adhesive)         1. Use the oval ad trace the sticky back canvas/paper. Cut out. Adhere to the oval.     2. Use the stipple brushes or sponges and color the canvas.     3. Add a little pink Gelato and smoosh it around

Be True to You

Image
Hello my lovelies! Today I have for you one of my favorite things to create- mini canvases. Ah they are so much fun and so very sweet. This project also uses one of my favorite charms sets- Vintage Birdcages. Supplies: Mini canvas, fancy napkin, acrylic paint, Mod Podge, epoxy sticker, beads, charms (bow and bird) Heat gun, tooth pick Vintage Birdcage Piccolos Enamel Adhesive Fluid Aged White enamel powder Gold & Copper enamel gels E600 glue First things first- separate the layers of your fancy napkin. Coat the canvas with mod Podge and stick the top (fancy) layer of the napkin onto the canvas. Once it's dry, tear off around the edges. Then paint the edges with acrylic paint. Randomly plop some enamel adhesive fluid onto the canvas and add Aged White enamel powder. Heat to melt the powder and activate the adhesive. Coat the solid background for the birdcage with enamel adhesive fluid and then Aged White powder. Heat it

Sweet Little Birdies

Image
Hello there! I don't know about you, but I'm itching for spring. Today I have for you not one but two sweet little birdie pendants in lovely spring colors.  This project has a short supply list and comes together pretty easily. Want to make 'em? Let's go! Supplies: Bird charms CA101 Rose Pearl Enamel Gel Enamel Powders: Brownstone & Turquoise Lagoon Enamel Adhesive Fluid E600 Glue Necklace Cords Jump Rings Heat gun, toothpick, big heavy book Punch out two solid birds and one swirly bird.  Separate the inside from the frame. Coat the solid birdies with the Rose Pearl enamel gel. I LOVE this color! (I used a pretty thick coat, so they sat overnight to dry) Use the Enamel Adhesive Fluid and powders to coat the other two bird pieces. I REALLY heated them up to get a nice smooth finish. Once your pink birdies are completely dry, use the toothpick to put E600 glue onto the backs of the two swi